Texas is a big place. In fact, there is 261,797 square miles of it. Texas is second in size only to Alaska. It is also home to a lot of Texans and is second largest in population behind only California. As of 2004 Texas has 303,176 miles of public roads. Motorcyclists make up 2.5 percent of all licensed drivers in the state of Texas. This equates to nearly 4000,000 motorcyclists on Texas roadways. So, why not have our very own Texas and Southwest specific motorcycle riding magazine? Well we do, and it is a very informative one as well.
I had seen Ride Texas displayed in the better magazine racks for sale, but had never bought one or read one, until recently. A few months ago I was reading on a great forum called Two Wheeled Texans and ran across a thread simply titled, “Ride Texas Magazine”. The title piqued my curiosity and so I clicked the link and entered the thread.
The author of this thread was Pooh Bear, a local rider from San Antonio. He posted the question, “Does anyone recommend this for subscription?” along with a link to the Ride Texas magazine website. I quoted and commented to a reply made by weekend warrior, another Texan from Lubbock, and added that I’d like to peruse an issue also.
I was surprised when humanrace, who rides out of Bryan Texas, quoted me and offered to send me a couple copies of Ride Texas. I shot off an email accepting the hospitality of the offer and a short time later two magazines arrived in the mail. On top of that, one of them was the much coveted March 2009 Top 10 Best in Texas Readers Choice Awards issue.
Ride Texas is not a new magazine; in fact they have been in publication for over ten years since founded in 1999 as TEXMOTO. Their claim to fame is being the first and only motorcycle-interest publication in Texas at that time. Since its inception they have won numerous journalism awards, including those for photography, writing, graphic design and layout. They have also been featured in a lot of other media as well.
Pick up a copy of Ride Texas magazine, or RTM for short, and the first farkle that catches your eyes are the breath taking, glossily detailed, photos. From the front cover to the ads in the back there is a lot of candy for the eye to see. You can tell that this is a quality magazine by how well it is put together. From the organization of the content to the layout of the pages, everything is tastefully done.
The front covers of RTM tactfully catch the reader’s attention giving up tantalizing hints of the wealth of information to be found between its pages. I found all the content to be relative to motorcycling in and around The Lone Star State. In fact, some of the information unearthed inside these magazines would be relative to anyone traveling in Texas whether they were on two wheels or more.
The contents of each RTM is mapped out on the first couple pages, page two and page four. From there you can jump to which ever article grabs your front tire or, you can just read them front to back. The editor, Valerie Asensio, usually starts the articles out with one of her own in the section entitled ONWARD. Valerie gives a warm invitation in the classic letter from the editor style for the readers/riders to not only enjoy the articles but to participate by riding to the destinations outlined in RTM.
Along with Onward there are several other sections that are in every edition of RTM. BEING THERE by Gene McCalmont was one of my favorites. Gene writes of his many life and motorcycle related experiences. I really like Genes writing style. He writes honestly and truthfully despite how humorous or embarrassing it may be. Gene also authors the section called AFTER THE RIDE subtitled Good life guide, where he espouses about the finer things in life to enjoy when the riding is done.
The (Almost) TRUE STORIES section is really quite funny. RTM also has the standard LETTERS section where they print subscribers letters and comments. The RTM INSIDE section has all the News and updates. On top of all the core magazine content they have the FEATURES section.
The FEATURES part of the magazine is where different writers will document there travels to different destinations in and around the great state of Texas. They document the travel rout as well as the sites to see along the way. Sometimes they will detail the planning of the ride, traveling tips, and give various contacts or resources used. At the destinations they not only describe places to see and stuff to do but also give you lodging choices. Another great feature is the list of great places to grab a bite to eat. It is also interesting to read about the different people they meet along the way like the owners or workers at the many places they stop in.
A lot of the rides are planned around the almost endless events in and around the great state of Texas. Rallies, parks, scenery, nature, concerts, festivals, fairs, sporting events, shows, rodeos, exhibits, and cook offs, are all destinations that that wind up inside the covers of RTM. Lastly, or maybe more importantly, RTM has included easy TEAR & GO maps of each trip that you can remove and take along on your own ride with you.
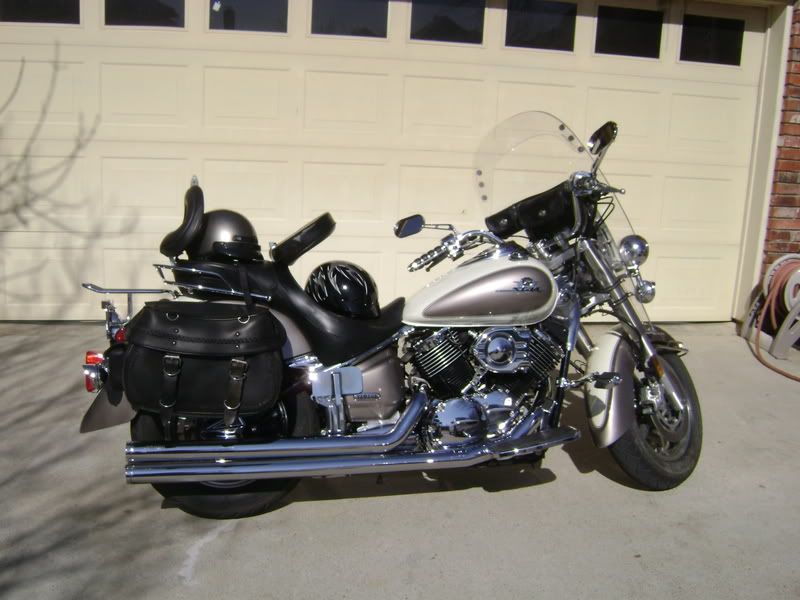
If you live in, travel in, or ride in Texas I definitely think it is worth it to subscribe to Ride Texas. The articles are all relevant and well written. The magazine is very well rounded and is also filled with local advertising. In the Top 10 BEST IN TEXAS Readers Choice Awards issue I was elated to see that the V-Star 1100 made it onto the Top 10 Best Bikes list at number six, I’m just slightly biased because I ride one. My only complaint is that RTM is only published bimonthly, but hey, they make it worth the wait.
Ride on,
Torch
I had seen Ride Texas displayed in the better magazine racks for sale, but had never bought one or read one, until recently. A few months ago I was reading on a great forum called Two Wheeled Texans and ran across a thread simply titled, “Ride Texas Magazine”. The title piqued my curiosity and so I clicked the link and entered the thread.
The author of this thread was Pooh Bear, a local rider from San Antonio. He posted the question, “Does anyone recommend this for subscription?” along with a link to the Ride Texas magazine website. I quoted and commented to a reply made by weekend warrior, another Texan from Lubbock, and added that I’d like to peruse an issue also.
I was surprised when humanrace, who rides out of Bryan Texas, quoted me and offered to send me a couple copies of Ride Texas. I shot off an email accepting the hospitality of the offer and a short time later two magazines arrived in the mail. On top of that, one of them was the much coveted March 2009 Top 10 Best in Texas Readers Choice Awards issue.
Ride Texas is not a new magazine; in fact they have been in publication for over ten years since founded in 1999 as TEXMOTO. Their claim to fame is being the first and only motorcycle-interest publication in Texas at that time. Since its inception they have won numerous journalism awards, including those for photography, writing, graphic design and layout. They have also been featured in a lot of other media as well.
Pick up a copy of Ride Texas magazine, or RTM for short, and the first farkle that catches your eyes are the breath taking, glossily detailed, photos. From the front cover to the ads in the back there is a lot of candy for the eye to see. You can tell that this is a quality magazine by how well it is put together. From the organization of the content to the layout of the pages, everything is tastefully done.
The front covers of RTM tactfully catch the reader’s attention giving up tantalizing hints of the wealth of information to be found between its pages. I found all the content to be relative to motorcycling in and around The Lone Star State. In fact, some of the information unearthed inside these magazines would be relative to anyone traveling in Texas whether they were on two wheels or more.
The contents of each RTM is mapped out on the first couple pages, page two and page four. From there you can jump to which ever article grabs your front tire or, you can just read them front to back. The editor, Valerie Asensio, usually starts the articles out with one of her own in the section entitled ONWARD. Valerie gives a warm invitation in the classic letter from the editor style for the readers/riders to not only enjoy the articles but to participate by riding to the destinations outlined in RTM.
Along with Onward there are several other sections that are in every edition of RTM. BEING THERE by Gene McCalmont was one of my favorites. Gene writes of his many life and motorcycle related experiences. I really like Genes writing style. He writes honestly and truthfully despite how humorous or embarrassing it may be. Gene also authors the section called AFTER THE RIDE subtitled Good life guide, where he espouses about the finer things in life to enjoy when the riding is done.
The (Almost) TRUE STORIES section is really quite funny. RTM also has the standard LETTERS section where they print subscribers letters and comments. The RTM INSIDE section has all the News and updates. On top of all the core magazine content they have the FEATURES section.
The FEATURES part of the magazine is where different writers will document there travels to different destinations in and around the great state of Texas. They document the travel rout as well as the sites to see along the way. Sometimes they will detail the planning of the ride, traveling tips, and give various contacts or resources used. At the destinations they not only describe places to see and stuff to do but also give you lodging choices. Another great feature is the list of great places to grab a bite to eat. It is also interesting to read about the different people they meet along the way like the owners or workers at the many places they stop in.
A lot of the rides are planned around the almost endless events in and around the great state of Texas. Rallies, parks, scenery, nature, concerts, festivals, fairs, sporting events, shows, rodeos, exhibits, and cook offs, are all destinations that that wind up inside the covers of RTM. Lastly, or maybe more importantly, RTM has included easy TEAR & GO maps of each trip that you can remove and take along on your own ride with you.
If you live in, travel in, or ride in Texas I definitely think it is worth it to subscribe to Ride Texas. The articles are all relevant and well written. The magazine is very well rounded and is also filled with local advertising. In the Top 10 BEST IN TEXAS Readers Choice Awards issue I was elated to see that the V-Star 1100 made it onto the Top 10 Best Bikes list at number six, I’m just slightly biased because I ride one. My only complaint is that RTM is only published bimonthly, but hey, they make it worth the wait.
Ride on,
Torch
![Reblog this post [with Zemanta]](https://lh3.googleusercontent.com/blogger_img_proxy/AEn0k_sL-Vn63ysLlQG-LqMyAQHbAJkgOxrt_eYnGjspjj3HCUOM9YMAas8CN2_HXaIOy326ROkGh9zGB7qWB6nN9TYWZO8ljQ90ENoC_ZDnW-a96IBkrvY8M6DpGr2Ijrbs7abCKmXsRfqiUw4Dv3BEuQTP=s0-d)


.jpg)
.jpg)


 I had to extend the buckles on my


 Now it was time to change the final gear oil. I located a 17mm socket and a drain pan. I could not get the ratchet with socket to fit in behind the
 ![Reblog this post [with Zemanta]](https://lh3.googleusercontent.com/blogger_img_proxy/AEn0k_vkklTnKe-QrYop_D9M0-c0qk0qiQ9LcDDY0A5Yyg_uEwsruaBQ2m2T2610j5eDpQ7BM4InW_sxbhuCCeoxsuVG56P0OkbDSI1_LbCuH7aAzHZYijHgfT27bxCLd6npKF18JpWcRT8hpqepxr94kakx=s0-d)


 Aangezien de bak sowieso een ramp was


 Sponsored by